Hardware Tex Pert

  • Subscribe to our RSS feed.
  • Twitter
  • StumbleUpon
  • Reddit
  • Facebook
  • Digg

Thursday, 30 December 2010

How to Sync a Mobile Phone With Your Computer

Posted on 19:30 by Unknown

How to Sync a Mobile Phone With Your Computer

Mobile phones have the ability to store a lot of useful information available at your fingertips, which is a blessing in today's fast-paced world. Like any device that stores information, you will want to back up your mobile phone in case it ever gets lost or broken.

1). Figure out the make and model of the cell phone you own. This information is usually on the rare side of cell phone. You can open the battery compartment and check the information on the sticker inside.

2). Select your method of syncing. You can either use a syncing service which is offered over the Internet or you can download syncing software onto your computer. With syncing software or services, you can enter or edit your data via the computer using a USB cable.

3). Choose the right software for the syncing process. There are many different software packages available on the Web. Make sure that you buy software that is compatible with your mobile phone and computer.

4). Find the USB cable that is compatible with your mobile phone. Check phone documentation for the right USB cable.

5). Connect the USB cable according to the instructions.

6). Look for the "PC sync" menu on your mobile phone. The PC sync menu is most likely located in the "Utilities" menu of your phone.

7). Select the "Send" option from your phone and wait for the data to transfer to your PC. When the send is complete your data in your PC and mobile phone is synchronized.
Read More
Posted in Hardware Support, Mobile Phone, PC Support, Sync Mobile with PC, Technical Support, TechSupp247 | No comments

What is DVI Port

Posted on 16:30 by Unknown
What is DVI Port

DVI Port (DVI stands for (D)igital (V)ideo (I)nterface)
DVI is a new form of video interface technology made to maximize the quality of flat panel LCD monitors and high-end video graphics cards. It is a replacement for the P&D Plug & Display standard, and a step up from the digital-only DFP format for older flat panels. DVI is becoming increasingly popular with video card manufacturers, and most cards purchased include both a VGA and a DVI output port.

DVI Formats
There three types of DVI connections:
1. DVI-D (Digital)
2. DVI-A (Analog)
3. DVI-I (Integrated Digital/Analog)
DVI-D (True Digital Video)
DVI-D format is used for direct digital connections between source video (namely, video cards) and digital LCD (or rare CRD) monitors. This provides a faster, higher-quality image than with analog, due to the nature of the digital format. All video cards initially produce a digital video signal, which is converted into analog at the VGA output. The analog signal travels to the monitor and is re-converted back into a digital signal. DVI-D eliminates the analog conversion process and improves the connection between source and display.

DVI-A (High-Res Analog)
DVI-A format is used to carry a DVI signal to an analog display, such as a CRD monitor or and HDTV. Although some signal quality is lost from the digital to analog conversion, it still transmits a higher quality picture than standard VGA.

DVI-I (The Best of Both Worlds)
DVI-I format is an integrated cable which is capable of transmitting either a digital-to-digital signal or an analog-to-analog signal, but it will not work transmitting a digital-to-analog or analog-to-digital signal.
Like any other format, DVI digital and analog formats are non- interchangeable. This means that a DVI-D cable will not work on an analog system, nor a DVI-A on a digital system. Make sure that you know what format each part of your equipment is before you purchase any DVI cables. Only equipment with a DVI port labeled 'DVI-I' will accept both a DVI-D and DVI-A source signal.

NOTE: Many manufacturers will use DVI ports with all available pin holes open. This does not mean that the port is DVI-I. It is a precautionary measure to prevent pins breaking off if the wrong type of cable is inserted. Verify the DVI format of the port from the label, manual, or manufacturer.
Read More
Posted in DVI Port, Hardware Support, PC Support, Technical Support, TechSupp247 | No comments

How to install a Network card

Posted on 15:30 by Unknown
How to install a Network card

Installing Network Card
1). Power down PC and remove the AC power cord and the computer case.

2). Find an available Peripheral Component Interconnect (PCI) slot on the motherboard and remove slot insert if one exists.

3). Carefully remove the network card from its static-proof plastic envelope, and slide it into the slot.

4). Seat the card in the slot firmly with gentle pressure along the length of the card, especially right about the slot itself.


5). Slowly screw the card to the computer frame, but do not over tighten.

6). Close the computer case and plug your computer in and power it up.

Verify Windows XP recognizes the new card.
1). Click Start, then click Control Panel.

2). In Category View (vs. Classic View) click Performance and Maintenance.

3). Click "System" icon at bottom of window.

4). Click the Hardware tab.

5). Click the Device Manager Button.

6). Double-click Network Adapters.
It should display the name of your Ethernet card.

7). Next, double click the name of your Ethernet adapter.
If the text in the "Device Status" box says "This device is working properly.", then you successfully installed the card and are finished.
8). If the text in the "Device status" box doesn't say "This device is working properly.", then write down on a piece of paper what it says and continue with next step.

9). Click the Troubleshoot. Button and follow instructions.
Read More
Posted in Hardware Support, Install Network Card, Network Card, PC Support, Technical Support, TechSupp247 | No comments

Types of DVD Drives

Posted on 13:00 by Unknown
Types of DVD Drives

There are many different types of DVD drives that are used on computers. Laptops computers use different drives than desktop computers. Also, different technologies allow your DVD drive to do different tasks.

Desktop Internal DVD Drives
Desktop internal DVD drives are exactly what their names infer. They are designed for mounting inside of the computer to allow easy access to the drive whenever you may need it. Often times, desktop DVD drives are mounted using a bracket on the front panel of the computer case. These types of drives connect directly to the logic board of the computer using two main types of connections: IDE and SATA. Internal desktop DVD drives commonly use a 5.25 inch form factor.
Laptop Internal DVD Drives
Laptop internal DVD drives serve the same purpose as desktop internal drives, except they are designed with a slimmer profile (23.7mm) to fit into tighter areas. Although they are slimmer, the form factor is the same as desktop DVD drives at 5.25 inches. Rather then using a designated mounting bracket, these drives are often built into laptop computers. However, they can usually be easily removed by taking out a couple of screws. These drives are often connected using IDE and ESATA.


External DVD Drives
The third type of DVD drive is an external DVD drive. Instead of connecting directly to the motherboard of the computer, these drives use a USB connection externally. These drives are really nothing more then a laptop internal drive or desktop internal drive encased in an enclosure. These drives work well for net books and laptops that do not include a built-in DVD drive.

DVD Drive Technologies
DVD drives are constantly improving in performance and technology. Almost all drives in production will now read a DVD disc; and DVD burners are using up to 24x write, which will burn a common DVD in less than 15 minutes. Also, DVD drives have expanded beyond just burning, as technologies such as Label Flash and Light scribe will not only burn a disc, but label it with the burner as well.
Read More
Posted in Hardware Support, PC Support, Technical Support, TechSupp247, Types of DVD Drives | No comments

How to Replace a Laptop DVD/CD ROM Drive

Posted on 08:30 by Unknown
How to Replace a
Laptop DVD/CD ROM Drive


1). Turn off the laptop and unplug the AC adapter. Remove the battery.

2). Turn over the laptop. The CD drive is normally held in place by only one or two small screws, located towards the middle of the computer. Sometimes, there is a picture of a CD drive next to the screw. Many times, the screw is underneath a label, necessitating the removal of the label.

3). Remove the screws.

4). With the screws removed, the old drive should slide out easily. Slide out the drive.

5). Slide the new drive into the case, and replace the screws.

6). Boot up the laptop. Install driver software if necessary, and make sure that the drive is recognized by the operating system.
Read More
Posted in DVD/CD ROM, Hardware Support, PC Support, Replace Laptop DVD/CD ROM, Technical Support, TechSupp247 | No comments

Wednesday, 29 December 2010

How to replace laptop hard drives

Posted on 19:30 by Unknown
How to replace laptop hard drives

1). Don't rush into replacing the hard drive before troubleshooting the problem. The first step to take when working on any laptop or notebook computer is to remove the battery. Even if the power button is well protected, like under the closed lid of the screen, it doesn't mean that the power might not come on due to a mechanical jolt or a short when you're working on the innards, so the best bet is to just get the battery out of there.

2). Laptop batteries generally require two actions to remove them. In this case, the lock is on the front edge of the case, and it slides to the side. After the lock is released, the battery slides back just an inch or so to release from the connector, after which it's lifted out and removed.


3). As we lift the lid over the hard drive, you can see the long plastic tube that serves both as a screw guide and as a mechanical support. It should be immediately apparent that the hard drive isn't going anywhere without the cage either being removed first or coming with it.

4). Closer inspection shows that this hard drive mounting system relies on the cage being attached to the hard drive before the hard drive is installed in the laptop. The only things that secure the hard drive and cage in the laptop are the power and data connector on one end, and a spring steel tab on this end.

5). Once the locking tab clears the stub projection that holds the hard drive cage in place, the end still has to be lifted up till it clears the bottom of the laptop. There's simply no room within the laptop bay to pull the hard drive back and disengage from the mating connector. One the cage clears the laptop; it takes a bit of force to pull the hard drive out on as shallow an angle as possible.

6). The first step in replacing the hard drive is removing the cage from the old drive, which is held in place with four screws. Make sure you note which way the cage goes on the old drive before you take it off, because it will need to be mounted on the new drive the same way, even though more than one orientation may be possible. You can see the corner of the new drive in the picture, in case you thought we only had one:-)

7). Once the replacement hard drive is mounted in the cage, the whole assembly can be reinstalled in the laptop. Again, keep the drive on as shallow an angle as possible, i.e. close to the bottom of the laptop, as you slide the pins into the connector. The close tolerances on the laptop bay usually make it impossible to mate the connector improperly.

8). If you worry about prying the drive against the connector when depressing the end of the cage so the tab clears the locking ear, you can hold the top edge of the cage out as you pry the tab in, as I'm doing here. Laptop hard drives aren't terribly rugged; they're so light and slim that I hate putting any more mechanical stress on them than I have to. Replacing laptop hard drives is a bit nerve racking for people who haven't done it before, but as long as you don't use an unreasonable amount of force, it should work out fine.

9). We replace the lid and use the long screw to reattach it to the bottom of the laptop. The emergency restore CD that comes with the laptop is used to reload all the software on the PC, but your data is gone unless you backed it up. The shiny circular thing is called a platter, on which the data is magnetically recorded and read by a read/write head on the end of the arm (currently in its park position away from the platter). The noise you here when your hard drive is operating is the arm swinging in and out over the surface of the platter, which spins under the read write head to provide access to all the usable locations on the drive.
Read More
Posted in Hardware Support, PC Support, Replace Laptop Hard Drive, Technical Support, TechSupp247 | No comments

External Sound Card

Posted on 19:00 by Unknown


External Sound Card

Sound cards are usually internal devices that plug into peripheral component interconnect, or PCI, slots. Computers have limited internal space and a predetermined amount of PCI slots. A user can still upgrade a sound card even if there is no space left inside the computer case by using an external sound card. External sound cards may operate slower than internal cards because they are physically located further from the CPU, but this change in speed may not be noticed by average users.

How to Install an External Sound Card

1. Read your computer's documentation to find out if the computer's current sound card must be disabled before installing a new one. If so then you must disable the sound card before installing the External
Sound Card.

2. Consult the sound card documentation. The sound card may have a disk to install drivers. The documentation will explain if the drivers should be installed before or after the card is installed. Many external hard drives are plug and play
USB devices, which means your computer will automatically recognize the device as soon as it is connected and powered and may not require any separate drivers to be installed.

3. Plug the sound card in. External sound cards are typically not externally powered. USB devices which require external power should be powered before connecting to the computer via the USB port.

4. Install applications for the device. You may not need to install drivers because the computer's operating system should automatically install drivers unless they were installed in a previous step; however, sound cards are often bundled with software pages including programs such as sound editors, media players or audio optimization software.
Read More
Posted in external sound card, install external card, install sound card, PC Support, Technical Support, TechSupp247 | No comments

How Does Flash BIOS Upgrades Work

Posted on 16:30 by Unknown

How Does Flash BIOS Upgrades Work

Your manual should state whether the board has a Flash BIOS (most modern ones do), but if you don't have a manual, or just want to make sure, look under the sticker and look for these codes on the chip (xxx just denotes the capacity):
# 28Fxxx - 12v
# 29Cxxx - 5v
# 29LVxxx - 3v (not often seen)
# 28Cxxx - EEPROM (like Flash, but needs a special device - Flash works in the motherboard)
# 27Cxxx - EPROM, so you need UV to erase it and a programmer to rewrite it.
# PH29EE010 - SST flashable ROM chip
# 29EE011 - 5v flashable Winbond chip
# 29C010 - 5v flashable Amtel chip

All the software you need will fit onto a boot floppy, which should naturally be checked for viruses. Aside from DOS, you will need the upgrade utility and the data file for your motherboard. Both will be obtainable from the web site or BBS of either your motherboard or BIOS manufacturer (try the former first). It will usually be a self-extracting compressed file with a .bin extension. The disk should have the DOS boot files only - no memory drivers! However, you might want to include an autoexec.bat file to automate the process, in case you have to do the job blind.
If something goes wrong, Award BIOS chips have a small amount code hardwired into them that will allow at least a boot from a floppy, although you will have to use an ISA video card, as the code only supports that type of bus. Intel motherboards have the same arrangement, and the code is activated by moving a Flash Recovery jumper, which activates a small amount of code in the boot block area (which, luckily, is non-erasable). Put the jumper in the recovery position, start the machine with a bootable diskette, listen to the speaker and watch the floppy access light (there’s no video available, due to the size of the code). When you hear a beep and the light comes on, the recovery code is being reloaded. When the light goes out, switch the machine off, put the jumper back to its normal position and continue.

The Flash ROM requires relatively high voltage to burn it, and this is usually set with a jumper on the motherboard (it may be marked 12v or 5v). If you don’t have a jumper, it will probably be done by the Flash software. The chips concerned can only be flashed for a limited number of times, and not a high one at that.

Take note of the current settings, so you can reinstall them after you have upgraded - turn off the System BIOS Cacheable option as well. In fact, it's a good idea to save your BIOS contents to a floppy as soon as you get your motherboard up and running. If updating a portable, run it from the mains, as a failure during the upgrade will cause severe problems. You may need to set a jumper or switch on the motherboard to allow the ROM to be written to, or to enable Boot Block Programming, if you want the official phrase.

Boot from the upgrade floppy, and run the utility. The command line will include the name of the utility and the file for the upgrade, typically:

flash p5_aw.14g

In the above example, flash is the name of the utility (flash.exe) and p5_aw.14g is the file containing the code for the BIOS; in this case, it's for the P5 motherboard, which has an Award BIOS (aw), revision 14g. Always save the current BIOS, if asked, so you can recover later. DO NOT TURN THE MACHINE OFF DURING THE UPGRADE, even if there is a recovery procedure-just repeat the process. If the problem persists, reload the BIOS you saved earlier. It's not a good idea to use another manufacturer's flash software, but, if you have an emergency, it would appear that Award's (awdflash) works with all except Asus boards, and MR's 29C010.exe is good, too.

Once everything has finished, check for a successful upgrade with the BIOS identifier on the screen, turn the machine off, reset the jumper, reboot and enter all the previous settings (though you may have to accept the defaults). Reboot again.
Read More
Posted in BIOS Flash, Hardware Support, PC Support, Technical Support, TechSupp247 | No comments

How to replace the CMOS battery

Posted on 15:30 by Unknown
How to replace the CMOS battery

If your computer is losing its time or date settings, or you are receiving a message CMOS Read Error, CMOS checksum error, or CMOS Battery Failure, first attempt to leave the computer on for 24 hours. In some cases this can charge the battery and resolve your issue. This often resolves CMOS battery related issues when a computer has been left off for several months. If this does not resolve your issue follow the below steps.

Locate your CMOS battery
 When inside your computer make sure you're aware of ESD and all it's potential dangers.
Open the computer case and find the battery on the computer motherboard, verify that it will be accessible and that it can be removed. Most computers today use a coin cell CMOS battery as shown in the image to the right.
 If you are unable to locate your CMOS battery you will need to refer to your motherboard or computer documentation and/or contact your computer manufacturer for additional assistance in locating it.

Obtain battery information
Unfortunately, most manufacturers will not list the exact type and model of your CMOS battery; therefore, once you have located the battery, write down all information about the battery (Voltage, chemistry, wiring, and packaging). If possible, remove the battery and take it to the location you plan on purchasing a new battery from. The part number for this battery for most computers is CR2032.

Removing the battery
 When inside your computer make sure you're aware of ESD and all it's potential dangers.
If you're computer is using a coin cell battery similar to the above example picture. Removing the battery is relatively simple. Simply use your fingers to grab on the edge of the battery and pull it up and out of the container holding it. Some motherboards have a clip holding the battery down. If your computer has this clip you may need to use one had to move the clip up and the other hand to pull the battery out.
Unfortunately, not all CMOS batteries are removable; some manufactures will only allow a replacement battery to be added. If you're not using a coin cell battery and are not able to determine how to remove it refer to your motherboard or computer documentation and/or contact your computer manufacturer for additional assistance in removing the battery or how to insert a new replacement battery.

Users with computers that do not have removable batteries only options to install a new battery will most likely also need to set a jumper when adding the new battery into their computer.

Insert the new battery
Once you have purchased a new battery, remove the old battery (as instructed above) and replace it with the new battery.

Enter CMOS values
Once the battery is replaced turn on the computer and resetting the CMOS values to the defaults. After the values have all been entered make sure to save the settings before exiting. Many CMOS setups allow you to press a key (such as F10) to save values and exit all in one action.
Read More
Posted in CMOS battery, Hardware Support, PC Support, Replace CMOS battery, Technical Support, TechSupp247 | No comments

How to install Heat Sink/Fan

Posted on 13:00 by Unknown
How to install Heat Sink/Fan

Today’s processors are running quite hot. Advancements are being made to make them run cooler at higher speeds, but the importance of a high quality heat sink and fan cannot be overstated. PCs that are not properly cooled can be quite unstable, or at its worse, it may not even boot properly.

It used to be that you could attach a heat sink and fan to your processor directly and not worry about it. Today, though, processors run too hot to do this and expect a reliable PC. One must use heat sink compound to seal the gap between the heat sink and the top of the processor.

Some heat sinks have a rubber heat pad on the bottom of them. In these cases, you don’t really need to use heat sink compound because the rubber pad will create the seal. It should be kept in mind, though, that if you are using a heat sink which has been used before and had a heat pad, that heat pad is now likely melted in the spot where the previous processor contacted it. In these cases, you cannot use the heat pad again as it will be ineffective. Instead, you need to clean the old rubber pad off of the heat sink using a non-abrasive cleaning compound.
Install Heat Sink
   1. Attach the fan to the heat sink; this step is almost always already done for you, but if not, you must do it yourself. This is done using the four screws that came with the CPU fan.

   2. Clean the top of the processor; using a lint-free cloth and isopropyl alcohol (or some other non-abrasive cleaning solution), ensure that the surface of the processor is clean and free of dust and finger oil. Do the same to the bottom of the heat sink. Pay attention to the note above on heat pads if your heat sink had or has a rubber heat pad.

   3. If you are using a cooling shim, place it onto the top of the processor now. Not all processors require shims. In fact, no processors require shims; they are completely optional. But, some people like to use them because they help to increase the surface area of the top of the ship and spread the weight around evenly. See, some processors (such as the Athlon XP) actually have the core sticking up slightly from the rest of the processor. So, when the heat sink is placed on top, all of its weight comes down on the core. If the fan is a real tight fit for the motherboard, it could really create a weight load on the processor core, and some people have actually crushed their CPU core by accident. A shim is simply a thin piece of metal, especially designed for a particular processor, which fits over the processor and evens out the height and helps to alleviate the crushed core problem. When installing a shim, be extra sure you are aligning it correctly. They often have holes in them exactly placed so that the cache bridges on top of the processor can poke through. If the shim is not properly aligned, you could short out these bridges and actually burn out your processor if you run your PC that way. Additionally, a mis-aligned shim could cause the heat sink to not actually have full content with the CPU core, leading to overheating.

   4. Apply the Heat Sink Compound; assuming you are not using a heat pad on your heat sink, apply a very thin layer of heat sink compound to the top of the processor core. If, as is the case with Pentium IV processors, the top of the processor is totally flat, and then apply the compound to the entire top surface of the processor. Many heat sinks come with heat sink compound in a small little package, usually just enough for a one-time install. You can pick up better quality compound online. Arctic Silver is a very popular choice. Be careful not to get compound on any motherboard electronics. Apply only a very small portion to the processor. Only a very thin layer is required. The compound must be spread out evenly across the top of the chip, forming that very thin layer. When spreading the heat sink compound, do not use your finger. Do not apply any heat sink compound if you plan to use a heat pad.

   5. Attach the Heat Sink; place the heat sink/fan combo squarely on top of the processor, pressing down lightly. Do not do any twisting as you install the heat sink. Press down firmly, but straight down so as to preserve the heat sink compound layer you just applied.

   6. Secure the heat sink; most new heat sinks use a set of clips on each side to fasten it down. These clips attach to a pair of tabs on each side of the socket. It will probably take a little bit of force to bend the clip down over the tab. Other heat sinks wrap around the processor, and then just sit on top, the compound being the only real attachment. Pentium IV motherboards have a heat sink retention bracket around the processor socket. When you install the P4 heat sink, you will fasten each of the four retention clips into the retention bracket and then close the clip levers on top of the heat sink to fasten the heat sink down onto the Pentium IV processor.

   7. Double-Check; no compound should have oozed out from the sides. If it did then you applied too much and need to remove the HSF, clean both the heatsink and CPU and start over.

   8. Attach fan to power source; unless your CPU fan is powered via a standard power supply plug, it is probably powered by a wire attached to a 3-pin power lead on the motherboard itself. You can attach this now. The CPU_FAN power lead is located near the CPU interface somewhere. The lead will have two small pins on each side, and these pins surround the power plug and the pins are inserted into the holes in the plug. It should be pretty easy and obvious.
Read More
Posted in Hardware Support, HeatSink, PC Support, Technical Support, TechSupp247 | No comments

Smartphones Cross Into Dual-Core Territory With LG Optimus 2X

Posted on 08:30 by Unknown
Smartphones Cross Into Dual-Core Territory With LG Optimus 2X

South Korea's LG Electronics unveiled the LG Optimus 2X, a smartphone with a dual-core processor.
This uses Nvidia's (Nasdaq: NVDA) Tegra 2 processor, making for faster, smoother Web browsing and a better multitasking experience.
The Optimus 2X will be released with Android 2.2; it will be upgradable to Android 2.3 later.

Optimus 2X Tech Specs
The Optimus 2X will offer 1080p high-definition video recording and playback with HDMI (High-Definition Multimedia Interface) mirroring.

This will let users run the videos on external displays at full HD quality. It will also allow a console-like gaming experience on external DLNA (Digital Living Network Alliance)-compatible digital device, such as HD TVs.

The Optimus 2X will be able to connect wirelessly to external DLNA devices.

The phone includes an accelerometer and gyro sensor. It also has a micro-USB port. The phone has a 1500mAH battery, LG said. It has a 1.3MP front-facing camera and an 8MP rear-facing camera.

Other Optimus 2X features include a 4-inch WVGA screen, and 8GB of memory expandable to up to 32GB using a microSD card.

Optimus 2X's Heart
The Optimus 2X uses a 1GHz Nvidia Tegra 2 processor. This is claimed to be the world's first mobile dual-core CPU. It is a dual-core ARM (Nasdaq: ARMHY) Cortex A-9 CPU.

The Tegra 2 includes an ultra-low power GeForce graphics processing unit (GPU). This lets it offer up to two times faster Web browsing and up to five times faster gaming. The GPU also includes what's claimed to be the world's first mobile 1080p HD video processor.
Read More
Posted in Dual Core in smartphones, Hardware Support, PC Support, Smartphones, Technical Support, TechSupp247 | No comments

Tuesday, 28 December 2010

IPS Technology in LCD's

Posted on 19:30 by Unknown


In-plane switching was developed by Hitachi Ltd. in 1996 to improve on the poor viewing angle and the poor color reproduction of TN panels at that time. Its name comes from the main difference from TN panels, that the crystal molecules move parallel to the panel plane instead of perpendicular to it.


This change reduces the amount of light scattering in the matrix, which gives IPS its characteristic wide viewing angles and good color reproduction.Initial iterations of IPS technology were plagued with slow response time and a low contrast ratio but later evolutions have made marked improvements to these shortcomings. Because of its wide viewing angle and accurate color reproduction (with almost no off-angle color shift).


          IPS is widely employed in high-end monitors aimed at professional graphic artists, although with the recent fall in price it has been seen in the mainstream market as well.


Read More
Posted in Hardware Support, IPS Technology LCD, PC Support, Technical Support, TechSupp247 | No comments

How to Install an ATI Radeon Video Card

Posted on 16:00 by Unknown
How to Install an ATI Radeon Video Card

ATI Radeon video cards are high end dedicated graphics cards produced by AMD (Advanced Micro Devices). ATI Radeon cards are used primarily for computer gaming and playing HD video, as many cards have HDMI and DVI ports to connect to HDTVs. To install an ATI Radeon card, a computer must have a PCI express slot, and the appropriate power connector for the card.
 
To install the ATI Radeon Video Card, follow the below steps:
1. Turn off the computer and unplug all the cords.

2. Open the case by unscrewing the screws on the right hand side of the case. This will release the side panel covering the motherboard.

3. Locate a PCI express slot. This slot is longer than the other expansion slots (PCI and AGP slots), Some motherboards have two PCI express slots.

4. Take off the slot cover. Each unused expansion bay on your computer will likely be covered by a metal cover which is mounted in place by a screw just inside the computer from the back of the case. Take out this screw to remove the cover.

5. Install the card. Align the card in the PCI express slot, making sure it is square with the slot, then push it in applying pressure to either side of the card, so it pushes in with uniform force. The card should pop into position and line up flush with the back of the case. You can screw the slot cover screw back in to secure the card.

6. Attach the card's power cord, if necessary. Some of most powerful video cards require a special PCI express power cord to be connected to it from the power supply.

7. Close the case, plug the cords back in and power on the computer.

8. Insert the driver CD into your CD drive and install the drivers appropriate for your operating system. ATI Radeon cards should come with a driver installation CD. You can also download drivers from AMD's website.

9. Restart your computer.
Read More
Posted in Desktops, Hardware Support, Install SATA drivers, Sata Drivers, Unable to detect SATA hard disk | No comments

How to Check Network or Wireless Adapter Driver Status in Windows 7

Posted on 10:30 by Unknown
Its is advised to check network or wireless adapter driver status in Windows 7 after installing the driver in order to make sure it works well before trying to connect to wired or wireless network. This avoids facing network connectivity problem due to incorrect or problematic driver.

To check Network or Wireless Adapter Driver Status
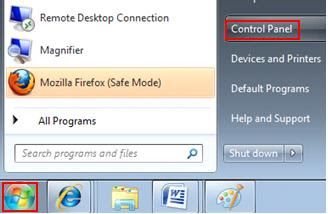
1)    Go to Start and click on Control Panel.


2)    Click on Hardware and Sound.


Note: If you view Control Panel by Large Icons or Small Icons, you can just double click the Device Manager.

3)    Click on Device Manager in Hardware and Sound window.


4)    The Device Manager will appear, then locate and expand Network adapters and right click the network or wireless adapter and then click on Properties.


5) The network or wireless adapter properties window will appear, your driver works well if it shows “This device is working properly” under General tab. You can also manually configure network adapter’s driver parameters under “Advanced” tab.


Note: If your device does not work well, click on Driver tab to check driver details, update driver, rollback driver, disable driver or uninstall driver.

Read More
Posted in Desktops, Hardware Support, Install SATA drivers, Sata Drivers, Unable to detect SATA hard disk | No comments

Friday, 24 December 2010

How to install and Setup a SATA Hard Drive

Posted on 13:00 by Unknown


This article will show you how to install and setup a SATA Hard Drive without any hassle

This article is applicable for Windows 7, Vista and Windows XP.

Warning
Always remember to discharge yourself before touching the HDD. This is done by touching the metal inside the case with you hands, as showed in the picture below


Note
These are the things you will need:
  • Screwdriver to screw the side of your case off/on
  • SATA Cable
  • Molex to SATA Converter [Only needed if no SATA Power Cable is available]
  • A SATA Hard Drive


Step 1. Installing the Hard Drive into the case.

1. Take out all wires and cables from the PC. Also hit the power button located on the back of the PC where the PSU is. Unplug the mains lead from the supply.

2. Screw the side panel of the pc


3. Connect your SATA Cable to the Motherboard


4. If needed connect your Molex to SATA converter

5. Put the harddrive into one of the free slots and connect the SATA power cable and the SATA Cable (Red)


6. Put the side panel on again, and screw in the screws

7. Connect all your cables to your PC again
 
Step 2. Checking if it's working

1. Turn on your PC

2. Go into your BIOS, and look if it shows the newly installed Hard Drive along with the rest of the system info


Step 3. Formatting and Using the Hard Drive

1. Click start menu  Right click Computer in the right panel  Click "Manage"

2. Enter the "Disk Management" (Look in the left pane)

3. You should now be able to see the Hard Drive in there as Unallocated space

4. Right Click the Bar in the bottom and click "New Simple Volume"


5. Follow the wizard, choose a name, amount of space the partition should have and the Drive letter.


6. Now you can see your new Hard drive in "Computer"


This article is applicable for Windows 7, Vista and Windows XP.

Read More
Posted in Desktops, Hardware Support, Install SATA drivers, Sata Drivers, Unable to detect SATA hard disk | No comments
Newer Posts Older Posts Home
Subscribe to: Posts (Atom)

Popular Posts

  • Partition External Hard Drive
    Partition External Hard Drive Most of the external hard drives come with one preformatted partition ready to use. But if it didn't, or i...
  • USB to Bluetooth Keyboards
    Bluetooth keyboards use the Bluetooth protocol to allow wireless connection to the computer. These keyboard s are becoming increasingly po...
  • Advantages and Disadvantages of External hard disk drives
    Advantages and Disadvantages of External hard disk drives External drives are arguably the biggest growth area in data storage of recent tim...
  • VESA VGA Monitor
    What Is a VESA VGA Monitor? VESA is a worldwide monitoring body for a variety of computer graphics standards. They're best known for Fla...
  • How to Customize your Power Button on the CPU
    Information This tutorial will explain how to change the start button in your computer to another button o...
  • How to Change the IRQ Settings in the BIOS
    Default motherboard BIOS settings usually do not need to be changed when the motherboard or computer is installed and will suffice for mo...
  • Printer goes offline on reboot
    On reboot computer, the printer in Windows 7 XP mode goes offline 1). In Control Panel, Printers, delete offline printers. If they wont dele...
  • USB to Serial Port Circuit
    USB to Serial Port Circuit Universal serial bus ( USB ) and serial ports are two different connection interfaces used with computers. Tho...
  • Setting Up a Wireless Router With DSL
     You can share a high-speed DSL connection between multiple users without a major decrease in Internet speed. Each brand of router uses a ...
  • Clean the Rollers on a Phaser 6120
    The Xerox Phaser 6120 uses laser printing technology to transfer digital images and text to paper, creating hard copies. In order to create ...

Categories

  • Acer Aspire Factory Settings
  • Add PU to SLES
  • Advantages of Optical Mouse
  • AGP Support
  • Animal Trough In FarmVille
  • ANSI Standards
  • Asus
  • asus prime sense
  • AT and ATX Motherboards
  • Ati Radeon.
  • ATX Cabinet
  • Barcode Printer
  • Barcode reader
  • Barebone Kit
  • best i7 motherboard
  • Best seeds
  • BIOS Flash
  • BIOS IRQ Settings
  • Bios Power Management
  • BIOS Recommended settings
  • BIOS Update
  • BIOS Upgrade
  • Black screen
  • Bluetooth Compatibility
  • Bluetooth Device Support
  • Bluetooth Keyboard
  • BlueTrack technology Mouse
  • Blur Monitor Screen
  • BT Hub
  • Buying a Gaming Computer
  • Cable STB to PC
  • Card Reader
  • Cassettes to CD
  • Cat5e and Cat6e Cable
  • Cat5e Cable Types
  • CD Drive
  • Change BIOS IRQ Settings
  • Change Ink Waste Pad
  • Change Power LED
  • Change Trays in HP M3085
  • CircuitBoard Tools
  • citrix ipad
  • Clean Processor Fan
  • Clean Roller on Phaser 6120
  • Clean TrackPad
  • Clear Paper Jam on Inkjet Printer
  • CMOS battery
  • Common PC Hardware Problems
  • Compare Cartridg Toner
  • Computer Backup
  • Computer Components
  • Computer Hardware Monitoring Tools
  • Computer Power Supply
  • Computer Specification
  • Computer Storage Capacity
  • Computer Wont power on
  • Computer Workstation
  • Configure Xbox Wireless Network Adapter
  • Configuring a Mother Board
  • Configuring PC Gamepads
  • Connect CCTV to Computer
  • Connect FingerPrint Reader
  • Connect Inspiron to Lexmark
  • Connect Laptop to A/V Receiver
  • Connect Laptop to TV
  • Connect LCD to Computer
  • Connect PC to TV Wirelessly
  • Connect prjector to a computer wirelessly
  • Connect Two Computer to Act One System
  • Connect Two Computer to One Monitor
  • Connect Two Computers using USB
  • Connect Two Routers on One Home Network
  • Connect Xbox 360 to HDTV
  • Connecting 5.1 speakers
  • Convert Component Output to VGA
  • Convert Headphone to USB for VOIP
  • Convert LCD to DVI
  • Convert USB to Parallel
  • cool
  • Coxial Cable Types
  • CPU Components
  • CPU Stress Tests
  • CPU Temperature
  • Custom Personal Computer
  • D-link Wireless Router
  • Data Transfer from HDD to HDD
  • DDRAM
  • Default DVI Port
  • Delete Master Boot Record
  • Dell Recovery
  • Dell Support
  • DesignJet Printer Head Path
  • Desktop Support
  • Desktops
  • Difference Between DVD-R and DVD-RAM Discs
  • Difference between IDE and SATA Hard Drives
  • Difference between LCD and LED Monitors
  • Difference Between Notebook and Small Laptop
  • Difference between Pentium and Centrino
  • Difference Between Regedit and Regedit 32
  • Disable BIOS Settings
  • disable hybrid power
  • Disassembling a Computer
  • display self test
  • Dispose Printer Toner
  • Dual Core in smartphones
  • Dual Core Vs Quad Core
  • Dual Layer DVD
  • DVD Drive
  • DVD/CD ROM
  • DVI Port
  • Enable ATI Theater Mode
  • Enable IOMMU BIOS
  • Erase Password Protection on Hard Drive
  • Error 633
  • Expand Printer Memory
  • Extended Partition
  • External Hard Drive
  • external sound card
  • External USB
  • Facebook
  • Facebook Games
  • farmville
  • Farmville coins
  • Fiber Optic Cables Parts
  • Find a Lost File
  • FireWire
  • Fix EXE and CDD Files
  • Format Printer
  • Format Protected Disk
  • Game Console Gamepad Configuration
  • Games
  • GeForce Installing Problems
  • General Compnents of PDA
  • Graphics
  • Grapics Card Diagnostics
  • Hard Disk Failure
  • Hard Disk Jumper Settings
  • Hard Disk Partition
  • Hard Disk Support
  • Hard Disk Types
  • Hard drive
  • Hard Drive Enclosure
  • Hardware Components
  • Hardware Diagnostics Tools
  • Hardware Expert
  • Hardware Issues
  • Hardware Requirements for Firewall
  • Hardware Support
  • Hardware Testing Tools
  • Hardware Texpert
  • hardwarwe texpert
  • HDMI Motherboard
  • HDTV Tuner
  • HeatSink
  • Hibernate WakeUp
  • Hide Computer ID
  • Hide Computer Identity
  • High Speed Hard Drives
  • How to Disable Automatic Driver Installation in Windows 7
  • How to fix Keyboard not detecting by the computer
  • How to force eject a stuck DVD/CD drive
  • How to reduce noise in PC
  • How to Scan film Slides using a Flat Bed Scanner
  • How to troubleshoot no sound from computer speaker
  • How to Use a Digital Camera as a Webcam
  • How to's
  • HP 3380 Scanner
  • HP Dream Screen
  • HP Laptop Power Jack
  • HP Support
  • hybrid power
  • i7 motherboard
  • i7 processor
  • Identify Xeon Processor
  • IEEE Wiring Colors
  • iMac Resolution
  • Inkjet Hub
  • InkJet Hub Printable
  • Inkjet Multifunction Printers
  • Install AGP Card
  • Install blue-ray drive
  • Install Bluetooth Device
  • Install DSL Modem
  • install external card
  • Install Fan in Computer
  • Install Graphics Card
  • Install Internal Card Reader
  • Install Internal Modem
  • Install Laptop Skins
  • Install Network Card
  • Install Plotter Support
  • Install printer
  • Install SATA drivers
  • Install ScanDisk Cruzer
  • install sound card
  • Install TV Tuner Card
  • Install Video Card on Laptop
  • Install WebCam
  • Invertor on Laptop
  • ipad
  • ipad cloud computing
  • IPS Technology LCD
  • Itouch as a Removable Disk
  • Jaz Drive
  • keep
  • Kensington Lock
  • Keyboard Installation
  • KVM Switch
  • Laptop
  • laptop doesn't power on
  • Laptop Glossy Screen
  • Laptop Hardware Failures
  • Laptop IR
  • Laptop LCD Inverter
  • Laptop Life
  • Laptop NumLock
  • Laptop Overheating
  • laptop support
  • Laptops
  • Laser Printer vs Ink Jet Printer
  • Laser Virtual Keyboard
  • Lenovo Ideapad Laptop
  • Lenovo Support
  • Linksys E1000 wireless-N router
  • Linksys USB wireless Adapter
  • Linksys Wireless N Home Router
  • Linksys wireless PCI Adapter
  • Linksys wireless-N Adapter
  • Linksys WRT54G2 Wireless Router
  • Locate Lost Files
  • Logical Drives
  • Magic Color
  • Magnetic Storage
  • Maximize Computer Brightness
  • Membrane Keypads
  • Memory Card types
  • Memory Module
  • Missing page break
  • missing redo
  • missing undo
  • Mobile Phone
  • Monitor beeping
  • Monitor blank
  • Monitor Issues
  • monitor self test
  • More farmville coins
  • MotherBoard Jumper settings
  • Motherboard Support
  • Motherboard Support Chipset Support
  • Mouse Pointer Disappears
  • Netgear wireless Access point
  • Netgear Wireless adaptor
  • NETGEAR Wireless Dual Band Gigabit Router
  • Netgear Wireless USB Adapter
  • Network Card
  • Network Switch
  • new block editor
  • New Seagate Harddisk
  • No display
  • Notebook Mouse
  • Notebook Screens
  • Nvidia Card Support
  • Nvidia Drivers
  • Nvidia GF114
  • Nvidia graphics card
  • NVRAM
  • Online games
  • onlive
  • Open Explorer.exe
  • Optical Drive
  • Optical Storage
  • Optical Storage More Durable than Magnetic Storage
  • Output devices
  • Parallel Computers
  • Parts of the System Case
  • PC Card to USB
  • PC Case
  • PC Speakers for Home Stereo
  • PC Support
  • PCI
  • PCI Adapter
  • PCI Express
  • PCMCIA Card
  • PDA Backup
  • PDA Soft Reset
  • PDA Warm Reset
  • Phaser Printer
  • Plasma Screen
  • Play Music on another computer speakers
  • Plotter Support
  • Power cycle
  • Power Supply
  • Power supply connectors
  • Power Switch
  • Primary Partition
  • Print a Color Image
  • Print Black and White on Canon MX850
  • Printer
  • Printer Color Alignment Issues
  • printer support
  • printers
  • Processor Fan
  • Processor Support
  • PS3 Controller
  • Rack Mount Power Supply
  • RAM
  • RAM Types
  • RAM Upgrade
  • Record Stereo to Computer
  • Remote Reader
  • Remove Ribbon Cable
  • Repair Maxtor Bad Sector
  • Repair Raw Drive
  • Replace CMOS battery
  • Replace HDMI with Ethernet Cables
  • Replace Ink in Canon MP970
  • Replace Laptop Battery
  • Replace Laptop DVD/CD ROM
  • Replace Laptop Hard Drive
  • Replace Laptop Keyboard
  • Replace Laptop RAM
  • Replace LED Bulb in Laptop
  • Reset BIOS Password
  • Reset Dell Axim Password
  • Reset Int Settings
  • Reset Laptop
  • Reset Low Ink Messages
  • Reset PDA
  • Reset Waste Ink on Canon Printer
  • Restore Fuction on HP Laptop
  • Return Toshiba to Orginal Settings
  • Safely Remove Hardware
  • Sandy Bridge Processor
  • Sapphire Radeon HD 6870 Vapor
  • Sata Drivers
  • Save Laptop Battery
  • Scan Documents
  • Scanner Support
  • SCSI to USB Adapter
  • SDRAM
  • Seagate Barracuda
  • Second Generation Intel Processors
  • Secondary IP Addresses With HSRP
  • Setup Computer to a Projector
  • setup dual monitors
  • Smart Switch
  • Smartphones
  • SMPS
  • Software to test Computer Hardware
  • Solid State drive
  • Sony Vaio USB
  • Specific Hardware not Working
  • spyware
  • Stream TV on VLC
  • Switch PC Hardware
  • Synaptics Pointing Deive
  • Sync Mobile with PC
  • System Crashing or Rebooting
  • Tape Drive Installation
  • Technical Support
  • TechnicalSupport
  • TechSupp247
  • The best online game
  • Thermal Grease
  • Thermal Printer
  • Three Port IEEE
  • Tools required while working on PC
  • Top 5 AMD Motherboards
  • Top 5 Video Crads
  • Touchpad
  • Types of Computer Mice
  • Types of DVD Drives
  • Types of Expansion Slots
  • Types of hard drives
  • Types of Input Devices
  • Types of Memory Cards
  • Types of Processors
  • UEFI Architecture
  • Unable to detect SATA hard disk
  • Unable to Scan from Konica Minolta
  • Unlock OSD
  • Upgrade Computer
  • Upgrade USB Drive
  • Upgrade WEP to WPA
  • USB 3.0
  • USB Adapter Types
  • USB Cables
  • USB Host Controller
  • USB Hub Specification
  • USB Not Working
  • USB Port
  • USB Portable Disk drive
  • USB Support
  • USB to PS2 Cable
  • USB Wireless Devices
  • Uses of Desktop Computers
  • VESA Bracket Mounts
  • Vesa Specification
  • Vesa VGA Connector
  • VESA VGA Monitor
  • VESA Wall Mount
  • VGA Shared Memory
  • Video card
  • Video Cards
  • Virtual System
  • Virus Removal Support
  • Virus Support
  • Visual Display Unit
  • Wakeup LAN
  • Ways to Keep Your PC Cool
  • Ways to Save Printer Ink
  • Web Monitoring
  • Webcam as Security Camera
  • Wet Laptop
  • windows 7 ipad. windows 7 on ipad
  • Windows 7 Optimization
  • windows 7 support
  • Windows XP Optimization
  • Wireless Access Point
  • wireless adaptor
  • Wireless Devices
  • Wireless Home Theater
  • Wireless Mouse Battery
  • Wireless Mouse Support
  • Wireless Network Types
  • Wireless PCMCIA Card
  • Wireless Printer Adapter
  • Wireless Router
  • Wireless Wep Password
  • Xeon Processors
  • Xerox Phaser 6360
  • Zynga
  • Zynga games

Blog Archive

  • ►  2011 (313)
    • ►  July (1)
    • ►  June (27)
    • ►  May (11)
    • ►  April (33)
    • ►  March (97)
    • ►  February (58)
    • ►  January (86)
  • ▼  2010 (63)
    • ▼  December (34)
      • How to Sync a Mobile Phone With Your Computer
      • What is DVI Port
      • How to install a Network card
      • Types of DVD Drives
      • How to Replace a Laptop DVD/CD ROM Drive
      • How to replace laptop hard drives
      • External Sound Card
      • How Does Flash BIOS Upgrades Work
      • How to replace the CMOS battery
      • How to install Heat Sink/Fan
      • Smartphones Cross Into Dual-Core Territory With LG...
      • IPS Technology in LCD's
      • How to Install an ATI Radeon Video Card
      • How to Check Network or Wireless Adapter Driver St...
      • How to install and Setup a SATA Hard Drive
      • How to Lock a Drive to a Specific Letter
      • How to Customize your Power Button on the CPU
      • How to Change the Displayed Name of the Processor ...
      • Acer ICONIA
      • Driver Verifier - Enable and Disable
      • How to Clean all Disk's with the Diskpart Command
      • How to Check If your Processor is 32-bit or 64-bit...
      • Difference Between Pentium Processor & Centrino
      • How to install keyboard
      • How to Install the Tape Drive
      • Configuration Error Messages and Meanings
      • How To Connect Laptop To TV
      • Different types of Memory Cards
      • How to Install an Internal Card Reader
      • How to install Bluetooth device in computer
      • Types of plotters
      • How to Install Plotter Driver to Your Desktop
      • How to replace laptop battery
      • UEFI Architecture Chips
    • ►  November (11)
    • ►  October (18)
Powered by Blogger.

About Me

Unknown
View my complete profile