Hardware Tex Pert

  • Subscribe to our RSS feed.
  • Twitter
  • StumbleUpon
  • Reddit
  • Facebook
  • Digg
Showing posts with label Desktop Support. Show all posts

Monday, 29 November 2010

Different Types of Computer Processors

Posted on 07:47 by Unknown
Different Types of Computer Processors

Traditionally computer processor design and innovation has advanced at an exceedingly fast rate. As a corollary, the market for computer processors is vast and often times confusing to a first time explorer. However, learning the key feature sets and functions that set each processor apart from one another is not very difficult at all.
Brands
Since the inception of mainstream computing into the homes of society, but there has been consumer and commercial level computer processor manufacturers. The Intel Corporation is undoubtedly the first name when any consumer thinks of the word processor is mentioned. Intel has been producing the most top-line computer processors for several decades now. AMD or Advanced Micro Devices is Intel's only true competitor in the computer processor market producing computer processors, which rival the speed and power of Intel's.

Architecture
When considering the architecture of a computer processor, there are really only a few key factors to consider. Whether the processor has a 32-bit or 64-bit core determines whether or not the processor can run your software correctly. The amount of on die processor cache memory is also of importance, as this integrated memory space is where processor instructions are held before execution. Finally, is the system a single, dual or quad core processor? While multicore processors do have their advantages there is still a lack of software able to utilize multicore processors.

Clock Speed
The clock speed of a computer processor determines the rate at which a processor executes instructions on data. Today this rate of execution is expressed in billions of instructions per second. Though having a computer processor with a high clock speed is advantageous, it alone is not the only factor that dictates overall system performance. Higher clock speeds increase all system tasks, such as web browsing, movie encoding, and system utilities like anti-virus software.

Maintenance
Computer processors must be maintained according to their manufacturer's specifications in order to perform at their full potential. All too often consumers will pick an expensive cutting edge processor while neglecting support hardware for their processor. Different processors require different power supplies, proper heat sink/ fan combos, and adequate memory in order to function correctly. Above all, different processors require different cooling solutions. Each processor has its own TDP (Thermal Design Power) which is an indication of heat output which must be dissipated.

Current Models
The most recent offerings from Intel and AMD are the Core i7 quad core and Phenom II quad core processors respectively. The Core i7 supersedes the Core 2 series of dual and quad core Intel processors and the Phenom II supersedes the Phenom I dual and quad core model AMD processors. Outside of extreme gaming or high-end 3D graphics applications, even the Phenom II and Core 2 older model processors are more than adequate for the home user and come at a much lower price point in most cases.
Read More
Posted in Desktop Support, Desktops, Hardware Support, PC Support, Processor Support, TechSupp247, Types of Processors | No comments

Monday, 1 November 2010

Printer goes offline on reboot

Posted on 13:13 by Unknown
On reboot computer, the printer in Windows 7 XP mode goes offline

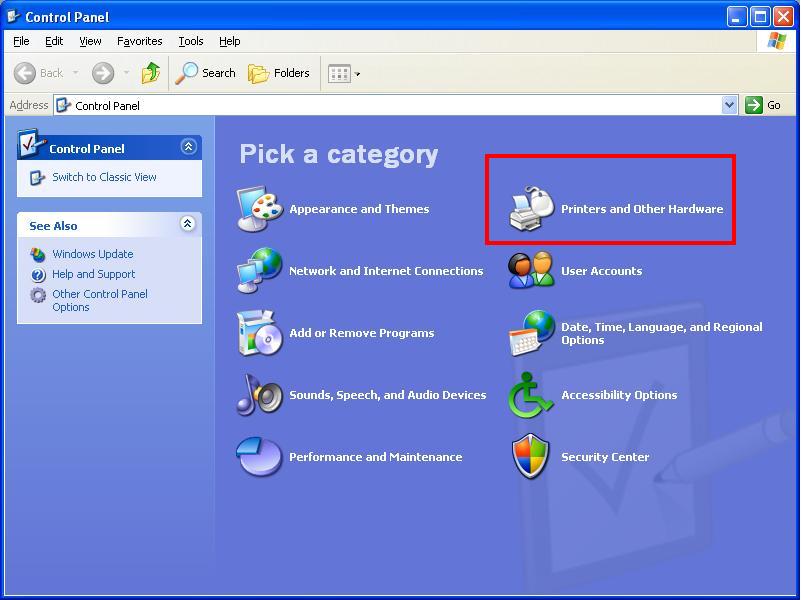
1). In Control Panel, Printers, delete offline printers. If they wont delete, it may be because there are pending print jobs in the queue. Open the printer and Cancel the jobs..


2). In Printer properties, Ports tab, delete the previously installed printers (offline status) that appear as Client Side Rendering Provider under the Description column.


To do this, highlight the port, then click on Delete Port button. Click Apply.


3). Restart your PC.
4). Now reinstall the printers as follows:
         1). Open Control panel, Printers, and click Add a printer.


         2). Click Add a local printer.
         3). Select the "Use an existing port" radio button, and select LPT1: (Printer Port). Click Next.
        4). Install the printer driver. Mine were found in the list inlcuded with Vista. Select the manufacturer and the printer. Click Next.
          5). In the next window, accept the printer name or type in a new name. Leave the "Set as default printer" box unchecked. Click Next.
5). Vista should now install the printer. A window should open saying "You've successfully added printer name.

6). DO NOT Print a test page at this time, because nothing is connected to the LPT1 port on the laptop. Just press Finish. The printer you just added should appear in the Printers window.
7). Click ONCE on the newly added printer to highlight it, then right-click and open Properties.
8). On the Ports tab, click Add Port “select Local Port, then click New Port”

9). When the Port Name window open, Enter a port name as follows: \computername\printername (replace computername with the name of your PC acting as print server, and printername with the name of your printer). Click OK.
10). You should now have a new port listed on the Ports tab of the printer Properties, but now the Description should be Local Port, instead of Client Side Rendering Provider. Click OK.

11). Now you can go to the General tab, and Print a Test Page.
Read More
Posted in Desktop Support, Desktops, External Hard Drive, Hardware Support, PC Support, Technical Support | No comments

Friday, 29 October 2010

RAM Failure

Posted on 13:03 by Unknown

RAM Failure

Summary: -

If you see random application crashes, kernel panics, and failures in simple programs that have worked for a long time, it is possible you are experiencing RAM failure. 

Symptoms: -

When RAM starts going bad, what you write to an address is not what you get back when you read it later. This causes random corruption of data, programs that crash, and even kernel "oops"es and kernel panics. If it's only a small amount of RAM that is corrupt then few programs will fail, but something will eventually fail when that memory gets used.
Some kernel panics may bring the system to a halt. If they reoccur soon after the system is off for a while you can be more confident it isn't a heat-related issue.
Even small programs may fail if they happen to use the affected memory. If they work once but then fail on a different attempt, this can be a sign of memory failure, since the memory used will be different from run to run.

Diagnosis:-

When a computer is turned on, it goes through what is called a POST (power-on self test) routine.  This is a short diagnostic procedure incorporated into the boot sequence by the BIOS manufacture for troubleshooting purposes. 


Many times when there is an error in your boot sequence you will receive an on-screen error message. This error was printed by the video card. But, in some cases, the error is detected early in the boot process and the error cannot be received by the video card. The problem may even be caused by the video card or the monitor.  This is why the need for beep codes came to be. If there are three short beeps when you turn on your computer, it indicates ram failure.


Once you suspect RAM is failing, I recommend using Memtest86+ (To download Memtest86+ click here Memtest86+). The easiest way to use it is find an Ubuntu CD. One of the options when booting from the CD is to run a memory test. Let it run through at least one entire test suite, such that the Pass column increases to 1. Preferably let it run overnight to get many successful runs.
Read More
Posted in Desktop Support, Desktops, Hardware Support, Hardware Texpert, PC Support, Technical Support, TechSupp247 | No comments

Computer POST / beep codes

Posted on 11:06 by Unknown
Computer POST / beep codes

AMI BIOS beep codes:
Below are the AMI BIOS Beep codes that can occur. However, because of the wide variety of different computer manufacturers with this BIOS, the beep codes may vary.


AWARD BIOS beep codes:
Below are Award BIOS Beep codes that can occur. However, because of the wide variety of different computer manufacturers with this BIOS, the beep codes may vary.


Read More
Posted in Desktop Support, Desktops, Hardware Support, Hardware Texpert, HP Support, PC Support, TechSupp247 | No comments

Thursday, 28 October 2010

How to Install a Sound Card on a Computer

Posted on 13:28 by Unknown
How to Install a Sound Card on a Computer

1). Shut down the computer.

2). Unplug machine from the surge protector.

3). Disconnect all peripherals from the computer.

4). Remove the cover of the chassis and lay computer on its side if it is a tower.


5). Ground yourself to the computer. If you have a grounding strap, put it on and follow its directions. Otherwise, ground yourself by touching a metal part of the chassis.

6). Remove the back panel, if necessary.

7). Locate the existing sound card if there is one already installed. If it is screwed in on the side of the slot hole, unscrew it and pull the card out firmly.


8). If the computer doesn't already have a sound card, find an open slot.

9). Knock out or unscrew the metal plate on the card's slot holder on the back panel.

10). Insert the sound card gently but firmly into the slot. Rock it into position if necessary, but don't force it. Don't touch any connectors on the card.


11). Connect cables from the CD-ROM drive to the sound card.

12). Replace the back panel and any removed screws. Screw sound card into slot holder if it has a screw hole.


13). Reconnect monitor, keyboard, and mouse. Connect speakers to the sound card's ports.

14). Turn on the speakers and restart the computer.

15). If Windows detects the sound card upon startup, follow instructions to install the card's driver and additional software. If Windows doesn't detect sound card, manually complete the installation using the Add New Hardware control panel.


16). Play music CD to test sound card.

17). Shut down computer.

18). Replace cover of computer. Reboot computer.
Read More
Posted in Desktop Support, Desktops, Hardware Support, PC Support, Technical Support, TechSupp247 | No comments

Wednesday, 20 October 2010

How to install wireless mouse?

Posted on 07:03 by Unknown
How to install wireless mouse?

Unpack the Equipment: -
Installing a wireless keyboard and mouse begins with unpacking all of the equipment from the box. If you purchased this as part of a rebate program, be sure to keep the UPC from the box.

Your product box will probably contain the following items:

•Wireless keyboard
•Wireless mouse
•Wireless receiver(s)
•Batteries (if not, you may have to supply these)
•Software (usually on a CD)
•Manufacturer instructions

If you are missing anything, contact either the retailer where you purchased the equipment or the manufacturer. Different products have different requirements so check the included instructions if you have them.

Setup the Keyboard & Mouse: -
Since the keyboard and mouse you're installing are wireless, they can not receive power from the computer like wired keyboards and mice can which is why they require batteries. Turn the keyboard and mouse over and remove the battery compartment covers. Insert new batteries in the directions shown (match + with the + on the battery and visa-a-versa).

Place the keyboard and mouse wherever comfortable on your desk. Please keep in mind proper ergonomics when deciding where to position your new equipment. Making the correct decision now can help prevent carpal tunnel syndrome and tendonitis in the future.

Position the Wireless Receiver: -
The wireless receiver is the component that physically connects to your computer and picks up the wireless signals from your keyboard and mouse, allowing it to communicate with your system.


Note:- Some setups will have two wireless receivers - one for the keyboard and the other for the mouse but the setup instructions will otherwise be the same.

While the specific requirements vary from brand to brand, there are two considerations to keep in mind when choosing where to position the receiver:

•Distance from Interference: Keep the receiver at least 8 inches (20 cm) away from sources of interference such as the computer monitor and computer case and other items that may cause interference such as fans, fluorescent lights, metal filing cabinets, etc.


•Distance from Keyboard and Mouse: The receiver should be positioned somewhere between 8 inches (20 cm) and 6 feet (1.8 m) from the keyboard and mouse.

Important:- Do not connect the receiver to the computer quite yet. This is a future step when installing the wireless keyboard and mouse.

Install the Software: -
Almost all new hardware has accompanying software that must be installed. This software contains drivers that tell the operating system on the computer how to work with the new hardware.


The software provided for wireless keyboards and mice differ greatly between manufacturers so check with the instructions included with your purchase for specifics. Generally, though, all installation software is fairly straightforward:

      1. Insert the CD into the drive. The installation software should start automatically.
      2. Read the on-screen instructions. If you're not sure how to answer some questions during the setup process, accepting the default suggestions are a safe bet.

Note:- If you do not have an existing mouse or keyboard or they are not functioning, this step should be your last one. Software is nearly impossible to install without a working keyboard and mouse!

Connect the Receiver to the Computer: -
Finally, with your computer turned on, plug the USB connector at the end of the receiver into a free USB port on the back (or front if need be) of your computer case.


Note:- If you have no free USB ports, you may need to purchase a USB Hub which will give your computer access to additional USB ports.

After plugging in the receiver, your computer will begin to configure the hardware for your computer to use. When the configuration is complete, you will probably see a message on the screen similar to "Your new hardware is now ready to use."

Test the New Keyboard & Mouse: -
Test the keyboard and mouse by opening some programs with your mouse and typing some text with your keyboard. It's a good idea to test every key to ensure there were no issues during the manufacture of your new keyboard.
If the keyboard and/or mouse do not function, check to make sure there is no interference and that the equipment is in range of the receiver. Also, check the troubleshooting information probably included with your manufacturer instructions.
Remove the old keyboard and mouse from the computer if they are still connected.
If you plan on disposing of your old equipment, check with IBM PC Recycling Service or Amandi Inc. for recycling information. If your keyboard or mouse is Dell-branded, they offer a completely free recycling service by mail (yes, Dell covers the postage) that I highly recommend you take advantage of.
Read More
Posted in Desktop Support, Desktops, Hardware Support, PC Support, Technical Support, TechSupp247, Wireless Mouse Support | No comments
Older Posts Home
Subscribe to: Posts (Atom)

Popular Posts

  • How to Disable BIOS Settings
    How to Disable BIOS Settings BIOS is an acronym for Basic Input/Output System. It is the boot firmware program on a PC, and controls the c...
  • How to Clean all Disk's with the Diskpart Command
    Information This will show you how to use the clean command on a selected disk to delete all of it's M...
  • Difference Between Pentium Processor & Centrino
    Difference Between Pentium Processor & Centrino The Pentium Series Intel's line of Pentium processors includes more than just lapto...
  • VESA VGA Monitor
    What Is a VESA VGA Monitor? VESA is a worldwide monitoring body for a variety of computer graphics standards. They're best known for Fla...
  • How to Change the IRQ Settings in the BIOS
    Default motherboard BIOS settings usually do not need to be changed when the motherboard or computer is installed and will suffice for mo...
  • How to Wake Up a LAN
    The networking power management features on your computer allow it to save energy. The most common network power management feature used is ...
  • Check System Specification
    Computer users should familiarize themselves with the specifications of their machines. This information is valuable when it comes time to...
  • Repair an HP Laptop Power Jack
     The majority of problems with DC power jacks on HP laptop models stem directly from a crack forming between the power jack's positiv...
  • Difference Between AT & ATX Motherboards
     A bit of research into the specific features of your motherboard can help you decide what to buy, and it can protect your computer from dam...
  • Reset the Waste Ink on a Canon Printer
    The Canon ink counter tool estimates your remaining ink usage, and should be reset each time you replace your ink cartridge . This tells y...

Categories

  • Acer Aspire Factory Settings
  • Add PU to SLES
  • Advantages of Optical Mouse
  • AGP Support
  • Animal Trough In FarmVille
  • ANSI Standards
  • Asus
  • asus prime sense
  • AT and ATX Motherboards
  • Ati Radeon.
  • ATX Cabinet
  • Barcode Printer
  • Barcode reader
  • Barebone Kit
  • best i7 motherboard
  • Best seeds
  • BIOS Flash
  • BIOS IRQ Settings
  • Bios Power Management
  • BIOS Recommended settings
  • BIOS Update
  • BIOS Upgrade
  • Black screen
  • Bluetooth Compatibility
  • Bluetooth Device Support
  • Bluetooth Keyboard
  • BlueTrack technology Mouse
  • Blur Monitor Screen
  • BT Hub
  • Buying a Gaming Computer
  • Cable STB to PC
  • Card Reader
  • Cassettes to CD
  • Cat5e and Cat6e Cable
  • Cat5e Cable Types
  • CD Drive
  • Change BIOS IRQ Settings
  • Change Ink Waste Pad
  • Change Power LED
  • Change Trays in HP M3085
  • CircuitBoard Tools
  • citrix ipad
  • Clean Processor Fan
  • Clean Roller on Phaser 6120
  • Clean TrackPad
  • Clear Paper Jam on Inkjet Printer
  • CMOS battery
  • Common PC Hardware Problems
  • Compare Cartridg Toner
  • Computer Backup
  • Computer Components
  • Computer Hardware Monitoring Tools
  • Computer Power Supply
  • Computer Specification
  • Computer Storage Capacity
  • Computer Wont power on
  • Computer Workstation
  • Configure Xbox Wireless Network Adapter
  • Configuring a Mother Board
  • Configuring PC Gamepads
  • Connect CCTV to Computer
  • Connect FingerPrint Reader
  • Connect Inspiron to Lexmark
  • Connect Laptop to A/V Receiver
  • Connect Laptop to TV
  • Connect LCD to Computer
  • Connect PC to TV Wirelessly
  • Connect prjector to a computer wirelessly
  • Connect Two Computer to Act One System
  • Connect Two Computer to One Monitor
  • Connect Two Computers using USB
  • Connect Two Routers on One Home Network
  • Connect Xbox 360 to HDTV
  • Connecting 5.1 speakers
  • Convert Component Output to VGA
  • Convert Headphone to USB for VOIP
  • Convert LCD to DVI
  • Convert USB to Parallel
  • cool
  • Coxial Cable Types
  • CPU Components
  • CPU Stress Tests
  • CPU Temperature
  • Custom Personal Computer
  • D-link Wireless Router
  • Data Transfer from HDD to HDD
  • DDRAM
  • Default DVI Port
  • Delete Master Boot Record
  • Dell Recovery
  • Dell Support
  • DesignJet Printer Head Path
  • Desktop Support
  • Desktops
  • Difference Between DVD-R and DVD-RAM Discs
  • Difference between IDE and SATA Hard Drives
  • Difference between LCD and LED Monitors
  • Difference Between Notebook and Small Laptop
  • Difference between Pentium and Centrino
  • Difference Between Regedit and Regedit 32
  • Disable BIOS Settings
  • disable hybrid power
  • Disassembling a Computer
  • display self test
  • Dispose Printer Toner
  • Dual Core in smartphones
  • Dual Core Vs Quad Core
  • Dual Layer DVD
  • DVD Drive
  • DVD/CD ROM
  • DVI Port
  • Enable ATI Theater Mode
  • Enable IOMMU BIOS
  • Erase Password Protection on Hard Drive
  • Error 633
  • Expand Printer Memory
  • Extended Partition
  • External Hard Drive
  • external sound card
  • External USB
  • Facebook
  • Facebook Games
  • farmville
  • Farmville coins
  • Fiber Optic Cables Parts
  • Find a Lost File
  • FireWire
  • Fix EXE and CDD Files
  • Format Printer
  • Format Protected Disk
  • Game Console Gamepad Configuration
  • Games
  • GeForce Installing Problems
  • General Compnents of PDA
  • Graphics
  • Grapics Card Diagnostics
  • Hard Disk Failure
  • Hard Disk Jumper Settings
  • Hard Disk Partition
  • Hard Disk Support
  • Hard Disk Types
  • Hard drive
  • Hard Drive Enclosure
  • Hardware Components
  • Hardware Diagnostics Tools
  • Hardware Expert
  • Hardware Issues
  • Hardware Requirements for Firewall
  • Hardware Support
  • Hardware Testing Tools
  • Hardware Texpert
  • hardwarwe texpert
  • HDMI Motherboard
  • HDTV Tuner
  • HeatSink
  • Hibernate WakeUp
  • Hide Computer ID
  • Hide Computer Identity
  • High Speed Hard Drives
  • How to Disable Automatic Driver Installation in Windows 7
  • How to fix Keyboard not detecting by the computer
  • How to force eject a stuck DVD/CD drive
  • How to reduce noise in PC
  • How to Scan film Slides using a Flat Bed Scanner
  • How to troubleshoot no sound from computer speaker
  • How to Use a Digital Camera as a Webcam
  • How to's
  • HP 3380 Scanner
  • HP Dream Screen
  • HP Laptop Power Jack
  • HP Support
  • hybrid power
  • i7 motherboard
  • i7 processor
  • Identify Xeon Processor
  • IEEE Wiring Colors
  • iMac Resolution
  • Inkjet Hub
  • InkJet Hub Printable
  • Inkjet Multifunction Printers
  • Install AGP Card
  • Install blue-ray drive
  • Install Bluetooth Device
  • Install DSL Modem
  • install external card
  • Install Fan in Computer
  • Install Graphics Card
  • Install Internal Card Reader
  • Install Internal Modem
  • Install Laptop Skins
  • Install Network Card
  • Install Plotter Support
  • Install printer
  • Install SATA drivers
  • Install ScanDisk Cruzer
  • install sound card
  • Install TV Tuner Card
  • Install Video Card on Laptop
  • Install WebCam
  • Invertor on Laptop
  • ipad
  • ipad cloud computing
  • IPS Technology LCD
  • Itouch as a Removable Disk
  • Jaz Drive
  • keep
  • Kensington Lock
  • Keyboard Installation
  • KVM Switch
  • Laptop
  • laptop doesn't power on
  • Laptop Glossy Screen
  • Laptop Hardware Failures
  • Laptop IR
  • Laptop LCD Inverter
  • Laptop Life
  • Laptop NumLock
  • Laptop Overheating
  • laptop support
  • Laptops
  • Laser Printer vs Ink Jet Printer
  • Laser Virtual Keyboard
  • Lenovo Ideapad Laptop
  • Lenovo Support
  • Linksys E1000 wireless-N router
  • Linksys USB wireless Adapter
  • Linksys Wireless N Home Router
  • Linksys wireless PCI Adapter
  • Linksys wireless-N Adapter
  • Linksys WRT54G2 Wireless Router
  • Locate Lost Files
  • Logical Drives
  • Magic Color
  • Magnetic Storage
  • Maximize Computer Brightness
  • Membrane Keypads
  • Memory Card types
  • Memory Module
  • Missing page break
  • missing redo
  • missing undo
  • Mobile Phone
  • Monitor beeping
  • Monitor blank
  • Monitor Issues
  • monitor self test
  • More farmville coins
  • MotherBoard Jumper settings
  • Motherboard Support
  • Motherboard Support Chipset Support
  • Mouse Pointer Disappears
  • Netgear wireless Access point
  • Netgear Wireless adaptor
  • NETGEAR Wireless Dual Band Gigabit Router
  • Netgear Wireless USB Adapter
  • Network Card
  • Network Switch
  • new block editor
  • New Seagate Harddisk
  • No display
  • Notebook Mouse
  • Notebook Screens
  • Nvidia Card Support
  • Nvidia Drivers
  • Nvidia GF114
  • Nvidia graphics card
  • NVRAM
  • Online games
  • onlive
  • Open Explorer.exe
  • Optical Drive
  • Optical Storage
  • Optical Storage More Durable than Magnetic Storage
  • Output devices
  • Parallel Computers
  • Parts of the System Case
  • PC Card to USB
  • PC Case
  • PC Speakers for Home Stereo
  • PC Support
  • PCI
  • PCI Adapter
  • PCI Express
  • PCMCIA Card
  • PDA Backup
  • PDA Soft Reset
  • PDA Warm Reset
  • Phaser Printer
  • Plasma Screen
  • Play Music on another computer speakers
  • Plotter Support
  • Power cycle
  • Power Supply
  • Power supply connectors
  • Power Switch
  • Primary Partition
  • Print a Color Image
  • Print Black and White on Canon MX850
  • Printer
  • Printer Color Alignment Issues
  • printer support
  • printers
  • Processor Fan
  • Processor Support
  • PS3 Controller
  • Rack Mount Power Supply
  • RAM
  • RAM Types
  • RAM Upgrade
  • Record Stereo to Computer
  • Remote Reader
  • Remove Ribbon Cable
  • Repair Maxtor Bad Sector
  • Repair Raw Drive
  • Replace CMOS battery
  • Replace HDMI with Ethernet Cables
  • Replace Ink in Canon MP970
  • Replace Laptop Battery
  • Replace Laptop DVD/CD ROM
  • Replace Laptop Hard Drive
  • Replace Laptop Keyboard
  • Replace Laptop RAM
  • Replace LED Bulb in Laptop
  • Reset BIOS Password
  • Reset Dell Axim Password
  • Reset Int Settings
  • Reset Laptop
  • Reset Low Ink Messages
  • Reset PDA
  • Reset Waste Ink on Canon Printer
  • Restore Fuction on HP Laptop
  • Return Toshiba to Orginal Settings
  • Safely Remove Hardware
  • Sandy Bridge Processor
  • Sapphire Radeon HD 6870 Vapor
  • Sata Drivers
  • Save Laptop Battery
  • Scan Documents
  • Scanner Support
  • SCSI to USB Adapter
  • SDRAM
  • Seagate Barracuda
  • Second Generation Intel Processors
  • Secondary IP Addresses With HSRP
  • Setup Computer to a Projector
  • setup dual monitors
  • Smart Switch
  • Smartphones
  • SMPS
  • Software to test Computer Hardware
  • Solid State drive
  • Sony Vaio USB
  • Specific Hardware not Working
  • spyware
  • Stream TV on VLC
  • Switch PC Hardware
  • Synaptics Pointing Deive
  • Sync Mobile with PC
  • System Crashing or Rebooting
  • Tape Drive Installation
  • Technical Support
  • TechnicalSupport
  • TechSupp247
  • The best online game
  • Thermal Grease
  • Thermal Printer
  • Three Port IEEE
  • Tools required while working on PC
  • Top 5 AMD Motherboards
  • Top 5 Video Crads
  • Touchpad
  • Types of Computer Mice
  • Types of DVD Drives
  • Types of Expansion Slots
  • Types of hard drives
  • Types of Input Devices
  • Types of Memory Cards
  • Types of Processors
  • UEFI Architecture
  • Unable to detect SATA hard disk
  • Unable to Scan from Konica Minolta
  • Unlock OSD
  • Upgrade Computer
  • Upgrade USB Drive
  • Upgrade WEP to WPA
  • USB 3.0
  • USB Adapter Types
  • USB Cables
  • USB Host Controller
  • USB Hub Specification
  • USB Not Working
  • USB Port
  • USB Portable Disk drive
  • USB Support
  • USB to PS2 Cable
  • USB Wireless Devices
  • Uses of Desktop Computers
  • VESA Bracket Mounts
  • Vesa Specification
  • Vesa VGA Connector
  • VESA VGA Monitor
  • VESA Wall Mount
  • VGA Shared Memory
  • Video card
  • Video Cards
  • Virtual System
  • Virus Removal Support
  • Virus Support
  • Visual Display Unit
  • Wakeup LAN
  • Ways to Keep Your PC Cool
  • Ways to Save Printer Ink
  • Web Monitoring
  • Webcam as Security Camera
  • Wet Laptop
  • windows 7 ipad. windows 7 on ipad
  • Windows 7 Optimization
  • windows 7 support
  • Windows XP Optimization
  • Wireless Access Point
  • wireless adaptor
  • Wireless Devices
  • Wireless Home Theater
  • Wireless Mouse Battery
  • Wireless Mouse Support
  • Wireless Network Types
  • Wireless PCMCIA Card
  • Wireless Printer Adapter
  • Wireless Router
  • Wireless Wep Password
  • Xeon Processors
  • Xerox Phaser 6360
  • Zynga
  • Zynga games

Blog Archive

  • ▼  2011 (313)
    • ▼  July (1)
      • Keep your laptop cool
    • ►  June (27)
    • ►  May (11)
    • ►  April (33)
    • ►  March (97)
    • ►  February (58)
    • ►  January (86)
  • ►  2010 (63)
    • ►  December (34)
    • ►  November (11)
    • ►  October (18)
Powered by Blogger.

About Me

Unknown
View my complete profile